Clean 'n' Go
 Clean your mouse, keyboard and monitor
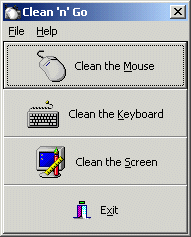
Clean 'n' Go prevents you from accidentally closing your important applications that contain unsaved data while you do that most necessary and annoying task - cleaning the mouse, keyboard or monitor.
Clean 'n' Go has also found application in hospitals, clinics, surgeries and medical centres for infection control.
If you just want to disable the keyboard, try our KeyboardLocker program.
 No actually itis a really fun little program. I read a review some one said
it's a cool program that they would not use often. However i think they're
nuts, I need to clean my mouse and keyboard every morning. So far I am
really loving it just tried it out this morning. The way you use the
keyboard to re-activate the mouse and then click the mouse to activate the
keyboard is pure genius. For as often as I use it it will have a place of
honor on my desktop, heck I might even put it in my start up folder ;)
- Dana
Features
- Simple to install - no configuration required.
- A single copy can be placed on the file server for everyone to access.
- We have created branded versions for a variety of magazines (with custom web pages) - please contact us for more information.
Feedback
- I don't use it often - but it's extremely handy when I do.
Clean That Mouse!
Mouse cleaning is an important PC maintenance process that is often overlooked. It is time for cleaning when you notice that the mouse cursor doesn't move smoothly over the screen as it should (sticking).
How to avoid sticky cursor syndrome:
- Don't spill beverages on your mouse pad.
- Try to keep hair, dust, and whatever else off your mouse pad.
- Use a slick mouse pad rather than a fabric one.
- Clean your mechanical mouse regularly.
To do a thorough cleaning, the following items should be on hand:
- Lint-free cleaning rags
- A can of ozone-safe compressed air, such as Dust-Off™
- A supply of swabs, preferably NOT cotton swabs, but foam-tipped instead
- Rubbing alcohol
- A copy of Clean 'n' Go to prevent any data loss due to inadvertent mouse clicks.
Procedure:
- Run Clean 'n' Go in mouse clean mode.
- Wipe the outside of the casing with a rag to remove grime and kill bacteria.
- Pick up your mouse and turn it belly-up.
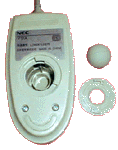
- Locate the plastic ring which the mouse ball pokes through (there should be arrows on it).
- Using both thumbs, rotate the ring in the direction of the arrows until it won't turn any further. If you don't have arrows, just turn it whichever way it will go.
- Place your hand loosely over the bottom of the mouse and turn the mouse
back over. The ball and ring should drop into your hand.

- Set the ring aside and wash the ball under lukewarm water.
- Set the ball aside and let it air dry.
- Hold the mouse up and spray some compressed air inside its now-empty
cavity. If you've been using your mouse for a few years without cleaning it, watch out for
falling fuzz balls and hairballs.
WARNING: Keep the can of air in its upright position so as not to freeze your mouse's guts with freon. Don't say I didn't warn you. - Put some rubbing alcohol on the end of your swab, and swipe the mouse guts pretty good (pay particular attention to the rollers). Probably the only place inside the mouse you shouldn't swab is the circuit board (usually the abdomen area). Lint prefers a damp swab to mouse guts, so you will usually pull the swab out with some fuzz on it.
- Wait for the now-clean mouse guts to dry.
- By now your mouse ball should be dry, so place it back in the cavity and restore the plastic ring to its original position.
Clean That Keyboard!
Your keyboard should be cleaned periodically, and it is easy to do so. It is time for cleaning when
- Keys show a build-up of dirt
- Dust and dirt come out from under the key caps and/or
- Keys begin to stick
To do a thorough cleaning, the following items should be on hand:
- Lint-free cleaning rags
- A cleaning solution, preferably static-free, such as Statx™. Pure alcohol is also suitable. HOUSEHOLD POLISHES SHOULD NOT BE USED ON KEYBOARDS. The silicone in the polishes may penetrate the key switches and prevent them from working. It is also advisable NOT to use a foam cleaner such as CleanFoam on the keys, as the foaming action may actually lift dirt particles and deposit them in the key switches.
- A can of ozone-safe compressed air, such as Dust-Off™
- A supply of swabs, preferably NOT cotton swabs, but foam-tipped instead
- A copy of Clean 'n' Go to prevent any data loss due to inadvertent key presses.
Procedure:
- Run Clean 'n' Go in keyboard clean mode.
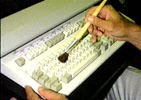
- Use the compressed air to blow any dirt or dust out from under the key
caps. Hold the keyboard on its end, with the keys facing slightly downward over a clean
sheet of paper. Blow out any dust and debris that has fallen between and under the keys,
working steadily down the length of the key panel. If a lot of dirt is present and refuses
to blow out, it may be necessary to remove the housing.

- To clean the tops of the key caps, simply soak a section of the rag with the cleaning solution and slowly rub the soiled areas until the dirt disappears. The sides of the caps can be cleaned by dipping a foam swab in cleaning solution and passing between the caps. DO NOT spray the keyboard, essentially flooding the unit, as drying out may be difficult without disassembling the housing. If using a foaming cleaner it should be first sprayed onto a lint-free cloth and the cloth used as required. Foam cleaners do not have the same bactericidal action as KeyClean, an important factor if more than one person uses a keyboard.
- If the keyboard still has sticky keys after following these instructions, get another keyboard.
If you just want to disable the keyboard, try our KeyboardLocker program.

 Windfile.com, Jun 2005